

How To Install Bacula On Ubuntu 16.04 With Webmin
###Introduction
Webmin is a modern, web control console for any Linux machine. It allows y'all to administer your server through an uncomplicated interface. With Webmin, yous tin modify settings for mutual packages on the fly.
In this tutorial, yous'll install and configure Webmin on your server and secure admission to the interface with a valid certificate using Let'due south Encrypt. You lot'll so use Webmin to add new user accounts, and update all packages on your server from the dashboard.
Prerequisites
To complete this tutorial, you will need:
- One Ubuntu sixteen.04 server set up past following the Ubuntu 16.04 initial server setup guide, including a sudo non-root user and a firewall.
- Apache installed past following How To Install Linux, Apache, MySQL, PHP (LAMP) stack on Ubuntu xvi.04. Nosotros'll utilise Apache to perform Let'due south Encrypt's domain verification.
- A Fully-Qualified Domain Proper noun (FQDN), with a DNS A record pointing to the IP accost of your server. To configure this, follow the tutorial How To Set Upward a Host Name with DigitalOcean.
Stride i — Installing Webmin
First, nosotros need to add together the Webmin repository so that we can easily install and update Webmin using our parcel manager. Nosotros do this by adding the repository to the /etc/apt/sources.listing file.
Open the file in your editor:
- sudo nano /etc/apt/sources.listing
And so add together this line to the lesser of the file to add the new repository:
/etc/apt/sources.list
. . . deb http://download.webmin.com/download/repository sarge contrib Save the file and exit the editor.
Next, add the Webmin PGP key then that your arrangement will trust the new repository:
wget http://www.webmin.com/jcameron-central.asc sudo apt-key add jcameron-cardinal.asc Next, update the list of packages to include the Webmin repository:
- sudo apt-become update
Then install Webmin:
- sudo apt-get install webmin
Once the installation finishes, you be presented with the following output:
Output
Webmin install consummate. You can now login to https://your_server_ip:10000 as root with your root password, or as any user who can utilise `sudo`. Delight copy down this information, every bit you volition demand it for the next step.
Note: If yous installed ufw during the prerequisite pace, you will need to run the control sudo ufw allow 10000 in guild to allow Webmin through the firewall. For actress security, you may want to configure your firewall to only permit access to this port from sure IP ranges.
Let's secure admission to Webmin by calculation a valid certificate.
Step ii — Adding a Valid Document with Let'due south Encrypt
Webmin is already configured to use HTTPS, but it uses a self-signed, untrusted document. Let'due south supplant it with a valid certificate from Let'due south Encrypt.
Navigate to https://your_domain:10000 in your web browser, replacing your_domain with the domain name you pointed at your server.
Note: When logging in for the showtime time, you volition see an "Invalid SSL" error. This is because the server has generated a self-signed certificate. Allow the exception to continue so you can supersede the self-signed certificate with one from Allow'south Encrypt.
You'll be presented with a login screen. Sign in with the not-root user you created while fulfilling the prerequisites for this tutorial.
Once you lot log in, the first screen y'all will see is the Webmin dashboard. Earlier yous can apply a valid certificate, you have to set the server'due south hostname. Wait for the System hostname field and lick on the link to the right, every bit shown in the post-obit effigy:
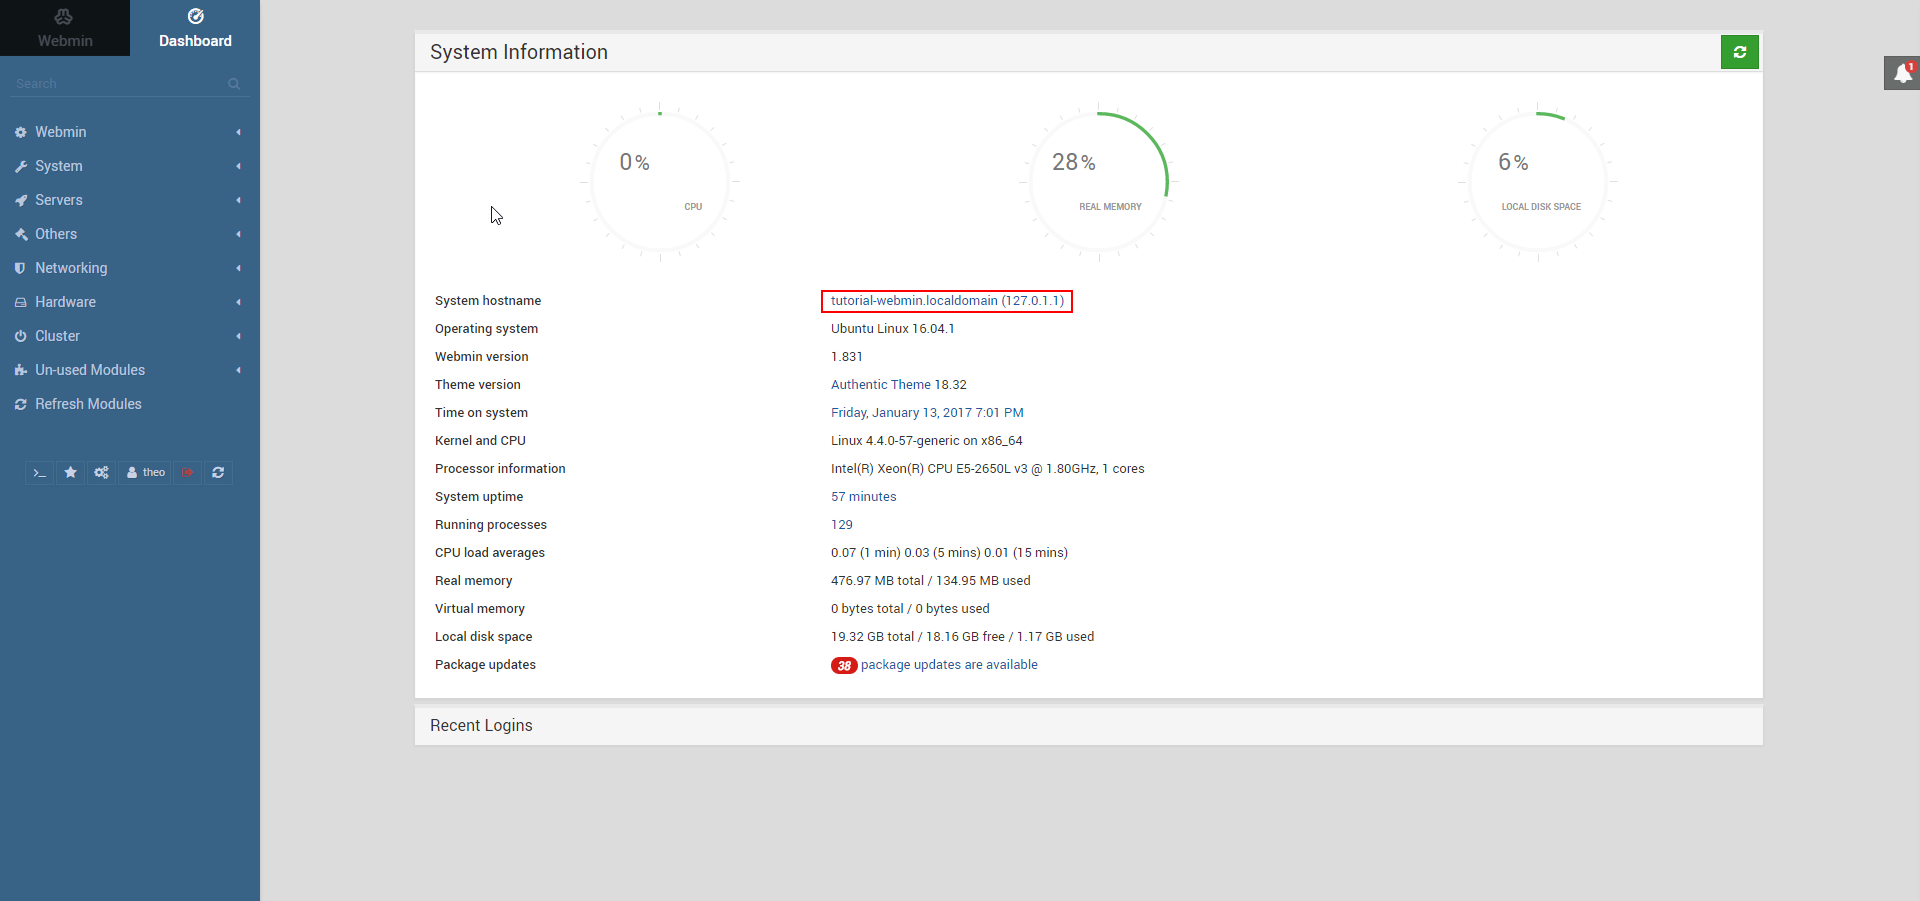
This wil take yous to the Hostname and DNS Client page. Locate the Hostname field, and enter your Fully-Qualified Domain Proper name into the field. Then press the Save button at the bottom of the page to apply the setting.
Subsequently you've set your hostname, click on Webmin on the left navigation bar, and so click on Webmin Configuration.
Then, select SSL Encryption from the listing of icons, so select the Let's Encrypt tab. You'll run into a screen similar the following effigy:

Using this screen, you'll tell Webmin how to obtain and renew your certificate. Let'due south Encrypt certificates expire after three months, just nosotros can instruct Webmin to automatically attempt to renew the Let'southward Encrypt document every month. Let's Encrypt looks for a verification file on our server, and so we'll configure Webmin to place the verification file inside the folder /var/world wide web/html, which is the binder that the Apache web server you lot configured in the prerequisites uses. Follow these steps to set up your certificate:
- Make full in Hostnames for certificate with your FQDN.
- For Website root directory for validation file, select the Other Directory push and enter
/var/www/html. - For Months between automatic renewal section, deselect the Only renew manually option by typing
oneinto the input box, and selecting the radio button to the left of the input box. - Click the Request Certificate push button. Later a few seconds, you will run into a confirmation screen.
To use the new certificate, restart Webmin past clicking the dorsum arrow in your browser, and clicking the Restart Webmin button. Look around 30 seconds, then reload the page and log in again. Your browser should now bespeak that the certificate is valid.
Step 3 – Using Webmin
You lot've now ready a secured, working instance of Webmin. Let'southward look at how to utilise information technology.
Webmin has many different modules that can control everything from the BIND DNS Server to something equally simple equally adding users to the system. Let'due south look at how to create a new user, and and so explore how to update the operating system using Webmin.
Managing Users and Groups
Let'southward explore how to manage the users and groups on your server.
First, click the Organization tab, and then click the Users and Groups button. Then, from hither, you can either add a user, manage a user, or add or manage a group.
Let's create a new user chosen deploy which would exist used for hosting web applications. To add a user, click Create a new user, which is located at the top of the users table. This displays the Create User screen, where you can supply the username, password, groups and other options. Follow these instructions to create the user:
- Make full in Username with
deploy. - Select Automatic for User ID.
- Make full in Real Proper name with a descriptive name like
Deployment user. - For Home Directory, select Automatic.
- For Shell, select /bin/bash from the dropdown listing.
- For Countersign, select Normal Password and type in a password of your choice.
- For Chief Group, select New group with same name every bit user.
- For Secondary Group, select sudo from the All groups listing, and press the -> button to add the grouping to the in groups list.
- Press Create to create this new user.
When creating a user, you tin can prepare options for password death, the user'due south crush, or whether they are allowed a home directory.
Next, permit'southward look at how to install updates to our system.
Updating Packages
Webmin lets you update all of your packages through its user interface. To update all of your packages, kickoff, go to the Dashboard link, then locate the Parcel updates field. If at that place are updates available, you'll see a link that states the number of available updates, as shown in the following figure:
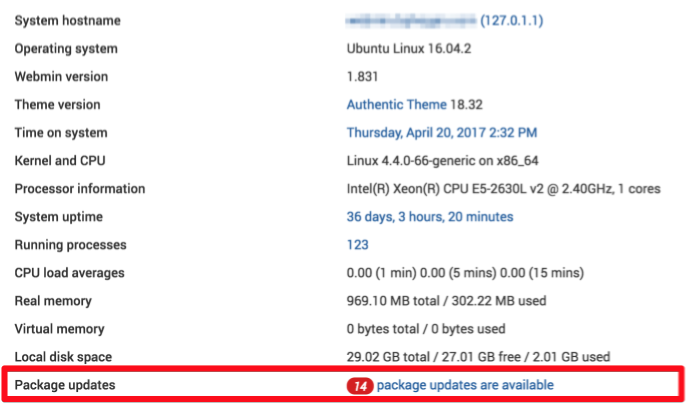
Click this link, then printing Update selected packages to offset the update. You may be asked to reboot the server, which you tin can also do through the Webmin interface.
Decision
You now have a secured, working instance of Webmin and yous've used the interface to create a user and update packages. Webmin gives you access to many things yous'd normally demand to access through the panel, and information technology organizes them in an intuitive mode. For example, if you take Apache installed, yous would discover the configuration tab for it under Servers, and so Apache.
Explore the interface, or read the Official Webmin wiki to learn more about managing your system with Webmin.

Source: https://www.digitalocean.com/community/tutorials/how-to-install-webmin-on-ubuntu-16-04
Posted by: jarrettsearpon.blogspot.com
0 Response to "How To Install Bacula On Ubuntu 16.04 With Webmin"
Post a Comment